
Automating Builds and Deployment with AWS CodeCommit, CodeBuild, and CodeDeploy


Table of contents
In this tutorial, we will walk through the process of building and deploying a web application using various AWS services. We will leverage AWS CodeCommit for version control, AWS CodeBuild for building the application, and AWS CodeDeploy for deploying the application to an EC2 instance. Additionally, we will automate the entire process using AWS CodePipeline. By the end of this tutorial, you will have a complete understanding of how to set up a CI/CD pipeline for your web application on AWS.
Prerequisites: To follow along with this tutorial, you should have the following prerequisites:
An AWS account with appropriate permissions to create and manage resources.
Basic knowledge of AWS services like EC2, IAM, CodeCommit, CodeBuild, CodeDeploy, and CodePipeline.
Familiarity with Git and version control concepts.
Step 1: Set up AWS CodeCommit Repository
Open the AWS Management Console and navigate to AWS CodeCommit.
Click on "Create repository" and provide a name for your repository.
Follow the instructions to create the repository.
Clone the repository to your local machine.
Place your code files in the local repository.
Commit and push the code to the CodeCommit repository.

Step 2: Set up AWS CodeBuild Project
Open the AWS Management Console and navigate to AWS CodeBuild.

Click on "Create build project" and provide a name for your build project.
In the "Source provider" section, select AWS CodeCommit and choose your repository.
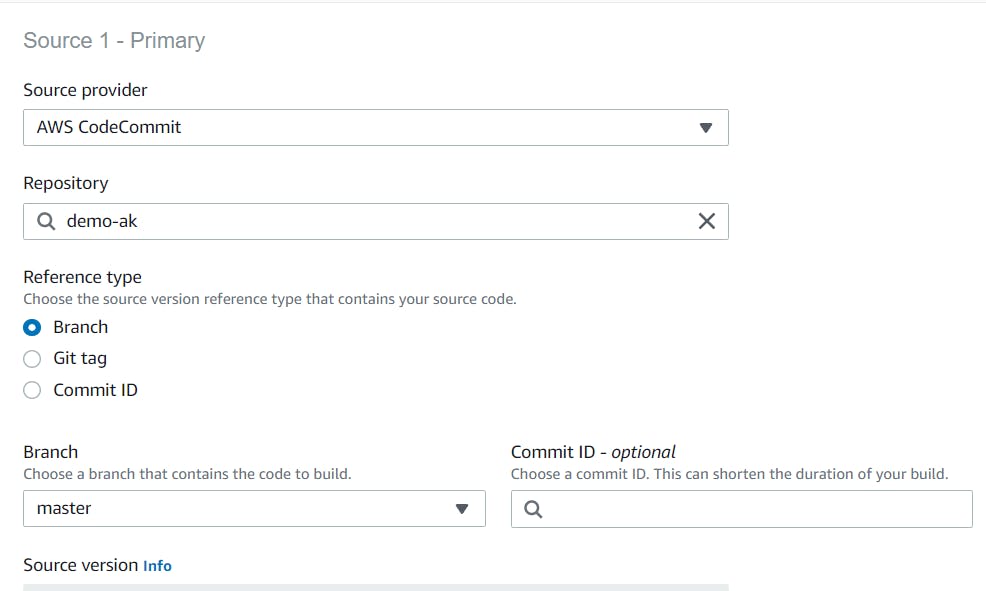
In the "Environment" section, select "Managed image" and choose Ubuntu as the operating system.
Choose "Standard" for the runtime and select the
aws/standard6.0image.
Scroll down to the "Buildspec" section and select "Use a buildspec file".
Just Create a
buildspec.ymlfile with the following content:version: 0.2 phases: install: commands: - echo Installing NGINX - sudo apt-get update - sudo apt-get install nginx -y build: commands: - echo Build started on `date` - cp index.html /var/www/html/ post_build: commands: - echo Configuring NGINX artifacts: files: - '**/*'Now push this file to CodeCommit Repository and select the buildspec file in the CodeBuild
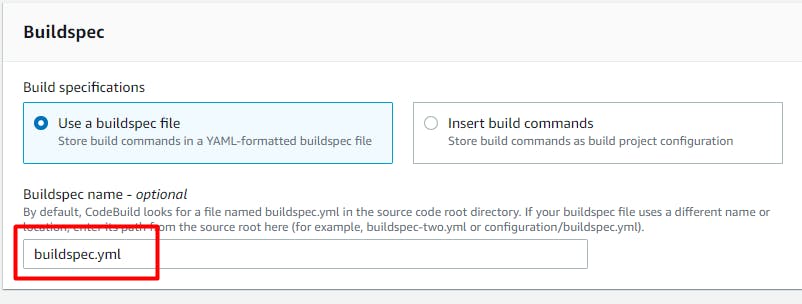
Upload the
buildspec.ymlfile to your CodeCommit repository.Configure the remaining options for your CodeBuild project and click on "Create build project"
Step 3: Set up AWS CodeDeploy Application and Deployment Group
Open the AWS Management Console and navigate to AWS CodeDeploy.
Click on "Create application" and provide a name for your application.
Choose "EC2/on-premises" as the compute platform.

Click on "Create deployment group" and provide a name for your deployment group.
Attach the required service role (e.g.,
my-codedeploy-service-role) that has the necessary permissions.
Select "In-place" as the deployment type.
Now go to EC2 Service and create a basic Ec2 instance for your application
Choose "EC2 instances" that you created as the environment and select the EC2 instance you want to deploy to.
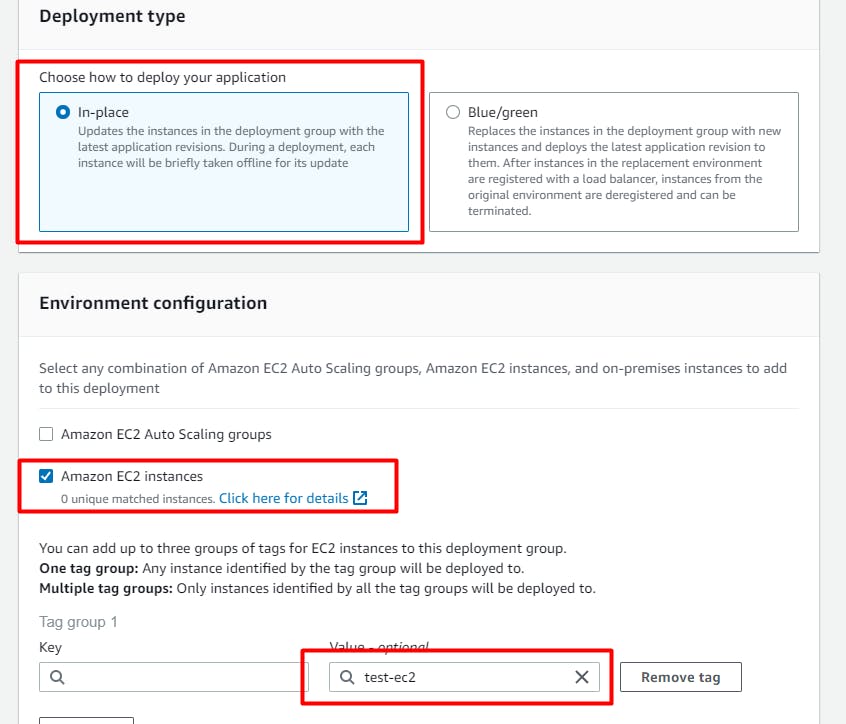
Select Never for Agent configuration for CodeDeployAgent and Disable load balancing if not required .

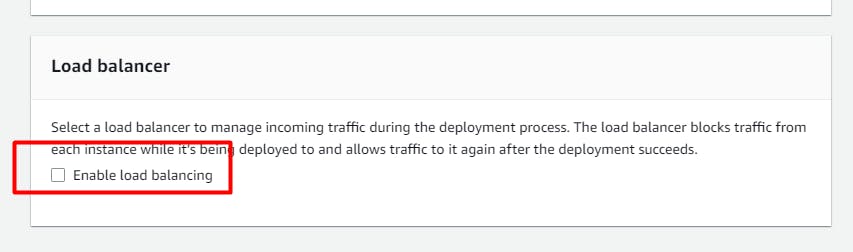
Configure the remaining options for your deployment group and click on "Create deployment group".
Step 4: Install CodeDeploy Agent on EC2 Instance
Connect to the EC2 instance you just created using SSH.
Create a bash script (e.g.,
install_codedeploy_agent.sh) and paste the following code:#!/bin/bash sudo apt-get update sudo apt-get install ruby-full ruby-webrick wget -y cd /tmp wget https://aws-codedeploy-us-east-1.s3.us-east-1.amazonaws.com/releases/codedeploy-agent_1.3.2-1902_all.deb mkdir codedeploy-agent_1.3.2-1902_ubuntu22 dpkg-deb -R codedeploy-agent_1.3.2-1902_all.deb codedeploy-agent_1.3.2-1902_ubuntu22 sed 's/Depends:.*/Depends:ruby3.0/' -i ./codedeploy-agent_1.3.2-1902_ubuntu22/DEBIAN/control dpkg-deb -b codedeploy-agent_1.3.2-1902_ubuntu22/ sudo dpkg -i codedeploy-agent_1.3.2-1902_ubuntu22.deb systemctl list-units --type=service | grep codedeployMake the script executable by running
chmod +x install_codedeploy_agent.sh.Run the script using
./install_codedeploy_agent.shto install the CodeDeploy agent.Verify the installation by running
sudo service codedeploy-agent status.
Step 5: Create appspec.yml File and Scripts
Now create a file named "appspec.yml" in the root of your repository with the following content:
 version: 0.0
 os: linux
 files:
   - source: /
     destination: /var/www/html
 hooks:
   AfterInstall:
     - location: scripts/install_nginx.sh
       timeout: 300
       runas: root
   ApplicationStart:
     - location: scripts/start_nginx.sh
       timeout: 300
       runas: root
Now in your CodeCommit repository or local repo, create a folder named "scripts". (Make sure to push the code to CodeCommit)
Inside the "scripts" folder, create a file named "install_nginx.sh" and add the following code:
 #!/bin/bash
 sudo apt-get update
 sudo apt-get install -y nginx
Create another file named "start_nginx.sh" in the "scripts" folder and add the following code:
#!/bin/bash
sudo service nginx start
Step 6: Create CodePipeline for Automation
Open the AWS Management Console and navigate to AWS CodePipeline.
Click on "Create pipeline" and provide a name for your pipeline.

Choose your CodeCommit repository as the source provider.
Select the appropriate branch and configure the change detection options.

Choose AWS CodeBuild as the build provider and select your CodeBuild project.

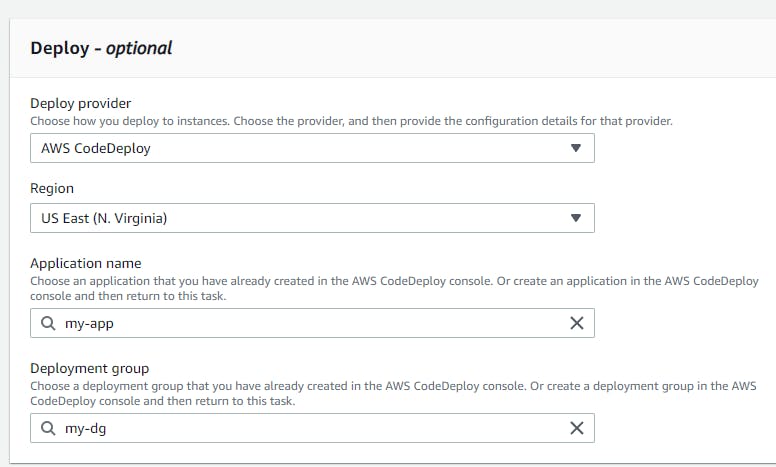
Select AWS CodeDeploy as the deploy provider and choose your application and deployment group.
Review the pipeline settings and click on "Create pipeline".
Step 7: Test the Automation
Make changes to your code in the CodeCommit repository and push the changes.
The CodePipeline will automatically trigger the build and deployment process.
Monitor the pipeline's progress in the AWS CodePipeline console.
Once the pipeline is successfully completed, access your deployed application using the EC2 instance's public IP in a web browser.
Congratulations! You have successfully set up a CI/CD pipeline using AWS CodeCommit, CodeBuild, and CodeDeploy. The pipeline will automatically build and deploy your code whenever changes are pushed to the repository.